
What is FBA prep? Everything Amazon sellers need to know
Descriptions
If you have ever searched for what is FBA prep and ended up more confused than when you started, well, you are not alone.
Amazon makes it sound simple. Get your products ready, send them in, and start selling. But what Amazon does not tell you upfront is that getting your products “ready” suggests meeting a very specific set of requirements.
After months of research, you finally found a winning product, placed a bulk order, and sent it straight to Amazon. You’re already running the numbers in your head when the email arrives that the shipment was rejected.
Or worse, Amazon accepted it, shoved it into stranded inventory, and is now charging you storage fees on stock you can’t even sell.
This is what happens when FBA prep goes wrong. Most sellers learn this the hard way. This guide exists so you don’t have to. Let’s break down exactly what is Amazon FBA prep service, where sellers trip up, and how to make sure your inventory lands on Amazon’s shelves, not back on a truck to your garage.
Quick guide:
- What is FBA prep?
- What are the FBA prep requirements you should make a note of
- What are the three ways to handle FBA prep?
- What DIY sellers consistently underestimate
- Which Option Is Right for You
- Pros and Cons of FBA Prep
- 8 Common FBA Prep Mistakes That Cost Sellers Money
- Final thoughts
What is FBA prep?
FBA prep is everything that needs to happen to your products before Amazon accepts them into its fulfillment center.
When you sell through Amazon FBA, you’re not shipping orders yourself. You send your inventory to Amazon’s fulfillment centers, and Amazon handles storage, packing, and shipping to the customer.
That’s the deal. But what happens before sending your products to the FBA center? Let’s figure it out.
What are the FBA prep requirements you should make a note of
Here is the list of FBA prep requirements you need to know.
Requirement 1: FNSKU Labeling
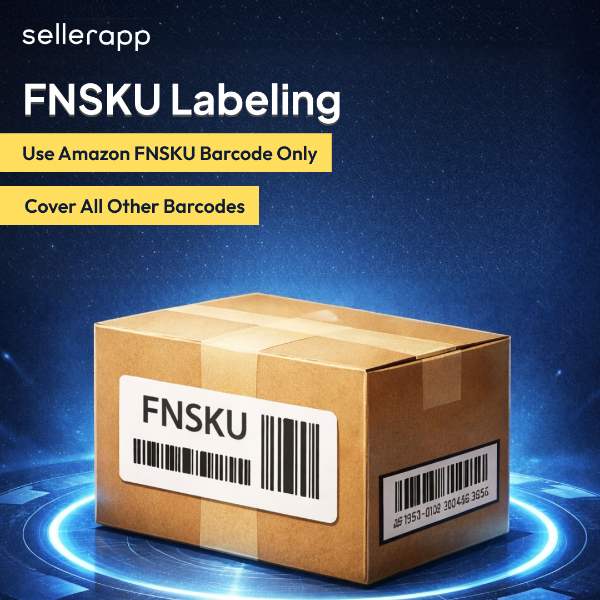
Every unit needs a scannable barcode generated specifically for your product and seller account by Amazon. This is the FNSKU, and it’s not interchangeable with your UPC or manufacturer barcode.
The rule is simple: one scannable barcode, on a flat surface, readable without repositioning the unit. Where sellers go wrong:
- Sending units with the manufacturer barcode still visible alongside the FNSKU. Amazon’s scanner picks up two codes and flags the unit immediately.
- When printing labels below 300 DPI, they scan inconsistently, causing receiving delays.
- Placing labels on curved surfaces, seams, or edges where the scanner can’t get a clean read.
Generate your FNSKU in, print on a 1″x2″ or 2″x3″ label, and cover every other barcode on the unit. That’s the standard.
Requirement 2: Poly Bagging
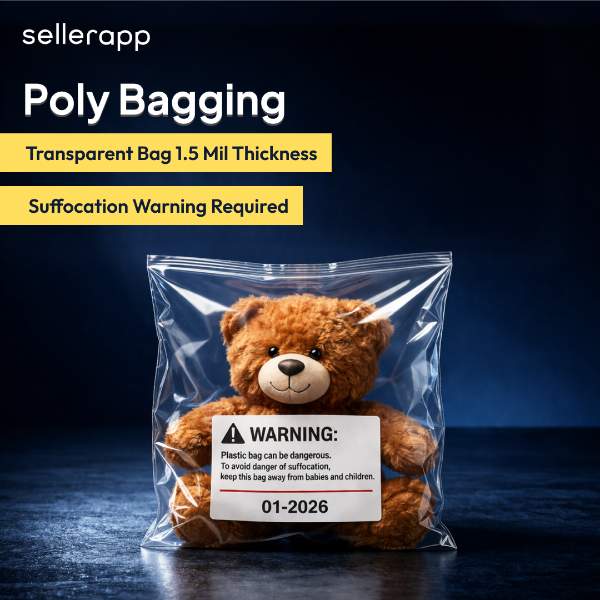
Required for soft goods, loose parts, plush items, and anything that could spill, scatter, or collect dust in transit. Amazon’s specs are specific:
- Transparent bags only
- Minimum 1.5 mil thickness
- Heat-sealed, not tape, not folded over
- If the opening is 5 inches or wider, a suffocation warning must be printed directly on the bag, not on a sticker, on the bag itself
- The FNSKU barcode must be scannable through the bag without opening it
The mistake most sellers make isn’t skipping the polybag; it’s sourcing bags without checking thickness, skipping the suffocation warning because “the bag is small,” or using bags that are oversized for the product.
An oversized bag means the product shifts, the barcode folds, and the unit fails at receiving.
Requirement 3: Bubble Wrap and Dunnage
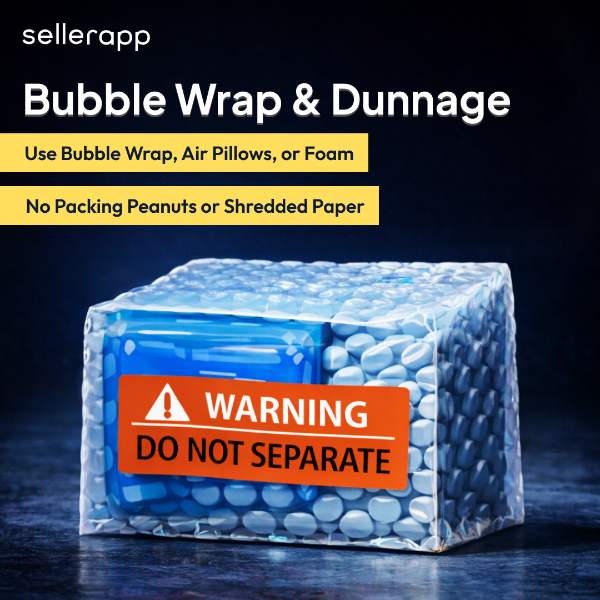
If your product is fragile, it needs protection, but Amazon is specific about what kind. Allowed inside cartons: bubble wrap, full sheets of paper, inflatable air pillows, and foam padding.
Prohibited: packing peanuts, crinkle wrap, shredded paper, and foam strips. They escape from boxes and the jam fulfillment center equipment. Amazon won’t just reject the shipment; they’ll note the violation against your account.
A practical test before your first shipment: drop the packaged unit from 3 feet on each side. If the product breaks or the packaging fails, it won’t survive Amazon’s receiving process either.
Requirement 4: Bundling and Kitting
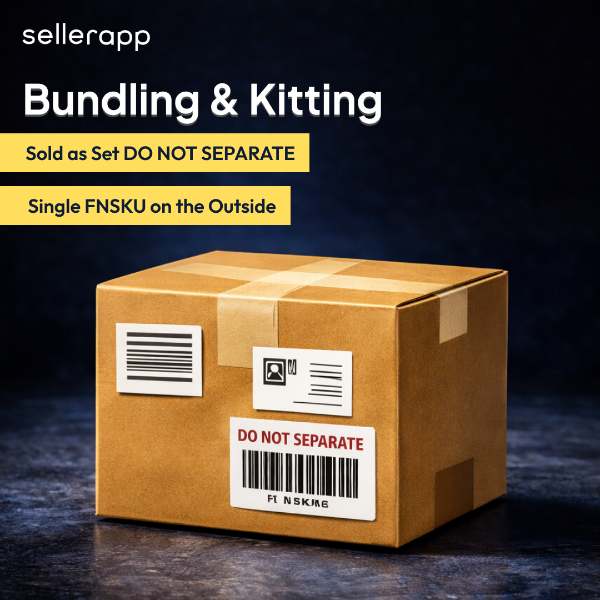
Selling two or more items as a single ASIN? Every bundle must be packaged and labeled as a single unit. The requirements:
- Outer packaging must be clearly labeled “Sold as Set Do Not Separate.”
- Individual barcodes on items inside the bundle must not be visible or scannable through the outer packaging cover, or black them out
- The bundle FNSKU goes on the outside, and that’s the only barcode Amazon should be able to scan
Without the “Do Not Separate” label, Amazon’s receiving team will open the bundle and check each item individually. Your inventory count gets messy, your bundle ASIN goes out of stock, and you’re left trying to sort it out via a support ticket.
Requirement 5: Custom Packaging
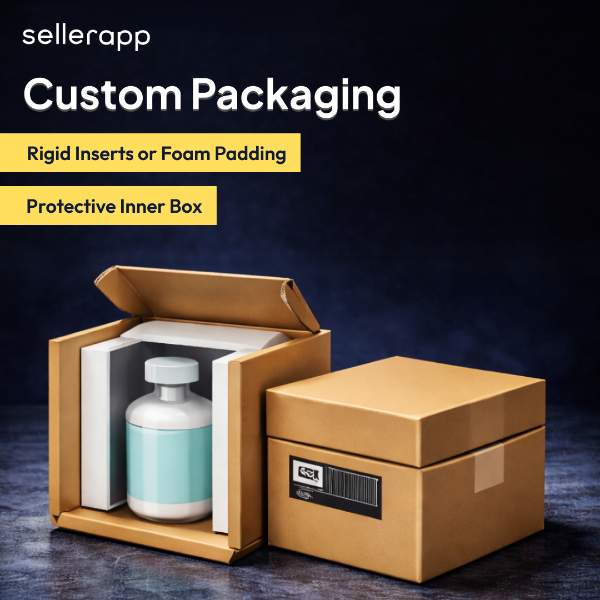
For fragile products, beauty, skincare, glass, and supplements in bottles, standard bubble wrap often isn’t enough. Amazon’s receiving process isn’t gentle. Units get conveyor-belted, stacked, and sorted at speed.
This is where over-boxing comes in: placing the product inside a custom-fitted inner box before it goes into the master carton. Rigid inserts, foam cutouts, and molded pulp trays all work. The goal is zero movement inside the box. If the product can shift, it will, and it’ll arrive damaged.
Custom packaging also protects your reviews. A product that arrives perfectly intact is a product the customer doesn’t think twice about. A product that arrives with a dented corner or cracked lid is a one-star review waiting to happen.
Requirement 6: Expiration Date Labeling
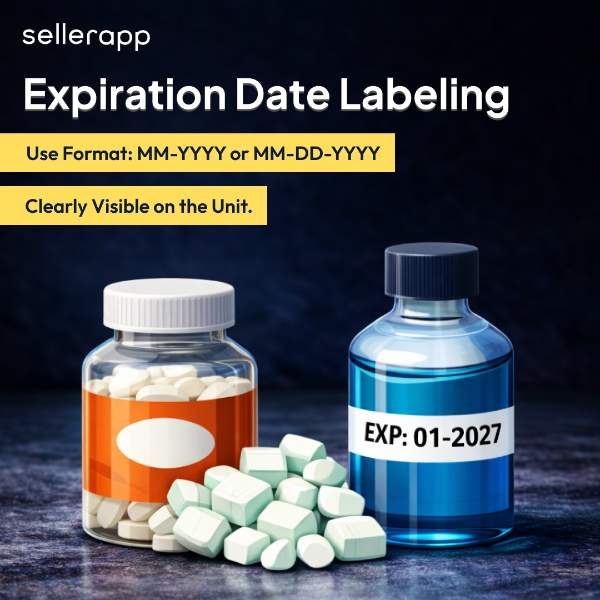
Applies to: food, supplements, vitamins, beverages, cosmetics, baby products, anything with a shelf life. Amazon’s requirements:
- Format: MM-YYYY or MM-DD-YYYY only
- Minimum font size: 36-point
- Must be visible on the exterior of each individual unit
- Must also appear on the master carton
- Remaining shelf life at time of receiving: minimum 90 days for most categories
Where this goes wrong: suppliers printing expiration dates on the bottom of bottles in small font or in a format like “Best By Jan 2026” instead of “01-2026.” Amazon’s receiving team checks the outside of units; if they can’t immediately read the date in the correct format, the unit fails.
Get the expiration date format confirmed with your supplier before production. Fixing it post-manufacture means full re-labeling at a prep center, which adds cost and delays your launch.
Requirement 7: Carton Labeling and Forwarding
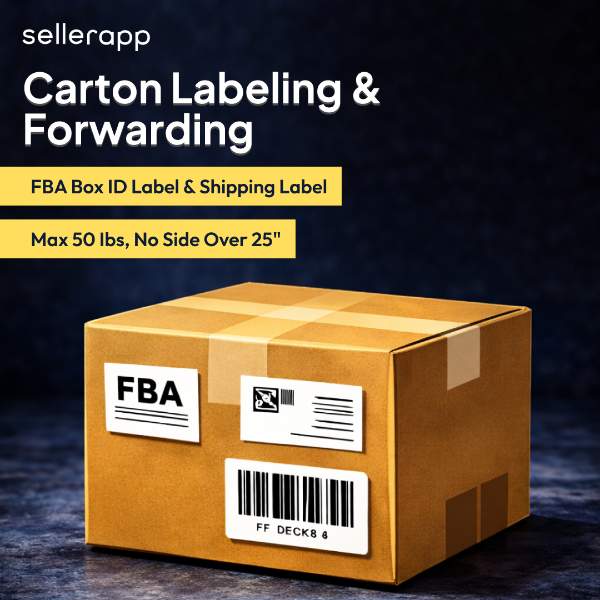
This is where sellers who’ve done everything right at the unit level still get tripped up. Every carton needs:
- An FBA Box ID label generated in Seller Central when you create your shipment plan
- A carrier shipping label
- Both labels on the same flat surface, not folded over an edge, not placed over a seam or tape
Box limits: no side longer than 25 inches and maximum weight of 50 lbs. Over 50 lbs needs a “team lift” label. Over 100 lbs needs a “mechanical lift” label.
For LTL shipments going on pallets, there’s an additional layer: four pallet labels, one on each side, with specific placement rules on top of everything at the carton level.
Suppliers build cartons for transit efficiency, not Amazon’s receiving rules. Always specify carton dimensions and weight limits in your purchase order, not as an afterthought after the goods are already packed.
Requirement 8: Palletization

For larger inventory movements sent via LTL or FTL, pallets have to be built to Amazon’s exact specs:
- Standard GMA pallets only (48″x40″)
- Maximum height: 72 inches, including the pallet, or 60 inches for top-heavy loads
- A securely stretch-wrapped product should not shift when the pallet is tilted
- Labeled on all four sides with the correct pallet label generated in Seller Central
A poorly built pallet is refused at the dock, regardless of how well each individual unit was prepped. If your FBA prep center or freight forwarder is building pallets, confirm they know Amazon’s current pallet requirements and they are updated periodically.
Requirement 9: Pick and Pack

For sellers running multiple SKUs, subscription boxes, or any product that requires assembly before shipping, pick and pack is part of the prep process. This means pulling the right items, assembling them correctly, verifying quantities, and making sure what’s in the box matches what was ordered every single time.
The error rate in pick and pack is where many prep centers quietly fail. One wrong SKU in a bundle, one short quantity in a subscription box, and you’re dealing with customer complaints and return requests that trace back to a fulfillment error, not a product problem.
If you’re outsourcing this, ask your prep center what their error rate is and what their policy is when they get it wrong.
Requirement 10: Product Inspection

The step most sellers skip and the one that causes the most downstream problems. Before any prep happens, someone needs to physically look at the product:
- Check for defects, damage, or manufacturing inconsistencies
- Verify quantities against the purchase order
- Confirm the correct SKUs shipped
- Flag packaging that won’t survive Amazon’s receiving process
A prep center that conducts thorough receiving inspections catches what your supplier missed, such as incorrect colorways, bent packaging, and units that don’t match the listing. Finding these before the shipment leaves for Amazon is infinitely cheaper than dealing with returns and negative reviews after launch.
If you sell supplements, beauty, or personal care products, take note of this.
Standard FBA prep covers physical packaging and labeling. For regulated categories, there’s a compliance layer on top of all of the above.
Supplements
This requires GMP certification from your current, third-party-verified manufacturer. Amazon also requires testing through an approved TIC organization before you can list.
Every unit needs lot tracking, and a good prep center enforces FEFO (First Expired, First Out) at pick, meaning the units closest to expiration ship first, not last.
Cosmetics and beauty products
These fall under the MoCRA (Modernization of Cosmetics Regulation Act), which added facility registration, adverse event reporting, and expanded FDA inspection authority. Temperature control matters too, as some formulations degrade outside specific ranges, which means your prep center’s storage environment is as important as the prep itself.
If you’re in any of these categories, your prep center needs to be FDA registered, have climate-controlled storage, and provide lot and expiry tracking documentation. Most generic prep centers can’t. Ask before you commit.
What are the three ways to handle FBA prep?
You’ve got three options. It depends on your volume, your time, and your product type; which one would make sense to you?
1. Do It Yourself
This will make sense when you, as a seller, are testing a product, working with low volumes, or just starting out.
What you need physically is a laser printer capable of 300 DPI, blank labels at least 1″ x 2″, polybags in multiple sizes, and a written process so nothing slips through. That last part matters more than the equipment. DIY prep done inconsistently is worse than outsourcing because you think it’s handled when it isn’t.
At low volumes, DIY costs you time but saves money. At higher volumes the equation flips, like every hour spent prepping is an hour not spent on sourcing, listings, or PPC. Most sellers hit that wall around 200–300 units a month. When prep starts competing with revenue-generating work, it’s time to move on.
What DIY teaches you that nothing else does as you learn Amazon’s requirements firsthand. You know exactly what a compliant unit looks like, what bad prep looks like, and what questions to ask when you eventually vet a prep center. Sellers who skip the DIY phase entirely and go straight to outsourcing often can’t tell when their prep center is cutting corners. That knowledge gap costs money.
What DIY sellers consistently underestimate:
Every SKU needs a written prep spec, FNSKU, polybag size, label placement, carton configuration, and category rules. When it’s just you, this lives in your head. The moment you bring in any help, undocumented prep introduces inconsistency, and inconsistency triggers inbound defect fees.
Your reorder cadence also needs to account for your own prep turnaround. Without that, you’ll hit stockouts that were entirely preventable.
And before your inventory checks into Amazon, your listing should be fully built, A+ content live, and your launch PPC structure ready. Every day your inventory sits on a listing that isn’t optimized is wasted sales velocity during the exact window Amazon’s algorithm is evaluating your product.
Option 2: Amazon’s Built-In Prep Service
Sellers note that this service is no longer available.
Amazon shut down all FBA prep and labeling services in the U.S. on January 1, 2026, covering labeling, poly bagging, bubble wrap, and opaque bagging across every inbound channel, including AWD, AGL, and SEND. Shipments arriving unprepped are non-compliant the moment they hit the dock.
This isn’t a minor policy update. Amazon is pushing full prep responsibility onto sellers and their partners permanently. If you were relying on this as a fallback, the answer is now Option 3.
Option 3: Use a Third-Party FBA Prep Center
A prep center receives your inventory from your supplier, inspects it, preps it to Amazon’s spec, and ships it in. You never touch the product.
The obvious benefit is time. The real value is everything underneath that.
The inspection layer
A good prep center catches what your supplier missed like wrong SKUs, short quantities, damaged units, and packaging that won’t survive Amazon’s receiving process. That catch happens before Amazon sees the inventory, before a customer opens the box, and before you’re managing returns or account flags.
If your prep center keeps flagging short quantities from a specific supplier, that’s a negotiation lever. If they keep catching the same packaging defect, that’s a quality conversation you need to have upstream. Without that layer, those issues surface as negative reviews instead.
Inventory staging
Rather than sending everything to Amazon at once and getting hit with storage fees, a prep center holds your reserve stock and releases it in batches.
This protects your IPI score, keeps you under storage limits, and gives you flexibility to respond to demand changes without overcommitting to Amazon’s network.
SOP-driven consistency
Every SKU should have a prep spec on file at your prep center, including label placement, packaging type, carton configuration, and category-specific requirements.
When Amazon updates its requirements, a good prep center updates your spec and flags it proactively. You find out before a rejected shipment tells you.
Returns processing
Units coming back from Amazon don’t have to go to waste. A prep center that handles returns inspects each unit, repackages what’s sellable, applies a fresh FNSKU, and sends it back in.
For categories with higher return rates, this recovers the margin most sellers are currently losing through removal orders.
For FBM-to-FBA transitions
Your existing stock probably isn’t packaged to FBA standards. Your supplier almost certainly packs for transit, not for Amazon’s receiving process.
A prep center bridges that gap, receiving your inventory, bringing it up to spec, and shipping it in while you focus on building out listings, A+ content, and your Amazon PPC structure for launch.
For sellers coming from Walmart, eBay, or DTC
Retail-ready and FBA-ready are not the same thing. Assume nothing carries over. Every requirement needs to be verified from scratch against your specific product.
The tradeoff
You’re paying per unit, per carton, or per pallet. And if the prep center makes a mistake, Amazon holds you accountable, not them.
This is why vetting matters and why the cheapest prep center is almost never the right one.
Which Option Is Right for You
| Metric | DIY | Third-Party Prep Center |
| Monthly volume | Under 200 units | 200+ units |
| SKU complexity | 1–3 simple SKUs | Multiple SKUs, bundles, regulated categories |
| Inventory staging | Limited | Full batch and drip-feed capability |
| Brand transition | Slower, manual | Faster, cleaner |
| Returns processing | Manual | Handled and documented |
| Error accountability | You catch your own | Contractually accountable |
Pros and Cons of FBA Prep
If you’re selling through Amazon FBA, FBA prep is mandatory. The real question is whether it’s working for your business or quietly costing you. Here’s the honest breakdown.
The Pros
Let’s see what benefits FBA prep holds for you.
1. It keeps your inventory moving.
Amazon won’t receive non-compliant inventory. Period. Getting FBA prep right means your stock checks in cleanly, hits a shelf fast, and starts generating sales velocity, which directly affects your organic ranking. Every day your inventory is stuck in limbo is a day your listing is losing ground.
2. It protects your account health.
Repeated inbound compliance failures don’t just cost you money; they flag your account. Inbound defect fees, shipment rejection notices, and repeat violations build a paper trail that Amazon uses to evaluate your seller health. Solid prep keeps that record clean.
3. It acts as a quality control layer.
When prep is done properly, especially by a third-party center that does receiving inspections, it catches problems before Amazon or your customers do. Wrong SKUs, short quantities, damaged units, and packaging that won’t survive the fulfillment center. Finding these before the shipment ships is infinitely cheaper than dealing with returns and negative reviews after.
4. It gives you inventory flexibility.
A good prep process, especially through a third-party center, lets you drip-feed inventory into Amazon in batches rather than sending everything in at once. That keeps long-term storage fees down, protects your IPI score, and gives you more control over your restock cycle.
5. It makes you a better operator.
Sellers who understand prep inside and out make fewer mistakes, ask better questions during vetting, and catch supplier errors earlier. It’s operational knowledge that compounds over time.
The Cons
Before you start with your FBA prep, read this list of cons that might help you.
1. It adds cost at every stage.
Whether you’re spending time doing it yourself, paying $0.30–$1.00+ per unit at a prep center, or both, prep has a real cost. For low-margin products, prep fees can be the difference between a profitable SKU and a break-even one. Always model prep costs into your unit economics before committing to a product.
2. It adds time to your inbound timeline.
Every step between your supplier and Amazon’s dock is a potential delay. DIY prep takes labor hours. Third-party prep centers add transit time and processing windows, typically 2–5 business days, longer during Q4. If your inventory planning doesn’t account for prep time, you’ll hit stockouts faster than you expect.
3. Mistakes still land on you.
If a prep center mislabels 200 units and they get rejected at Amazon’s dock, Amazon holds you accountable, not the prep center. You have to recover the cost from the prep center separately, and you still eat the delay. This is why vetting prep centers properly isn’t optional.
4. Amazon’s requirements change without much warning.
Packaging specs, category-specific requirements, expiration date rules, and hazmat classifications get updated, and Amazon doesn’t always send clear seller notifications. If you’re not actively monitoring Seller Central and prep guideline updates, you can be compliant one month and non-compliant the next.
5. It’s one more thing that can break at scale.
At low volumes, prep is manageable. At 10,000 units a month across multiple SKUs with different prep requirements, it becomes a logistics operation of its own. Sellers who don’t build proper prep systems early enough find themselves with a bottleneck that slows down their entire supply chain.
8 Common FBA Prep Mistakes That Cost Sellers Money
These are the 8 common FBA prep mistakes that will shock you. Here is what most sellers do:
Mistake 1: Sending units with manufacturer barcodes when FNSKU is required
As we have mentioned this earlier in the previous section, if your product is set to FNSKU in Seller Central and units arrive with only a manufacturer’s barcode, Amazon can’t tie the units to your account.
It gets rejected or misrouted to another seller’s inventory. Generate FNSKU labels in Seller Central, print at 300 DPI minimum on a 1″x2″ or 2″x3″ label, and cover every other scannable barcode on the unit.
Mistake 2: Polybags that are the right type but the wrong size
An oversized bag causes the product to shift, the barcode to land on a fold, and, in some cases, triggers Amazon’s suffocation warning requirement even when the opening is under 5 inches.
Buy bags close to your product dimensions, with a snug fit, sealed flat, and a barcode readable without repositioning the bag.
Mistake 3: Bundles where individual item barcodes are visible through packaging
If individual barcodes are readable through clear or transparent outer packaging, Amazon’s scanner picks them up instead of the bundle Amazon FNSKU.
The bundle gets broken apart in the system. Cover individual barcodes so they can’t be scanned through, label the outside “Sold as Set, Do Not Separate,” and use your bundle FNSKU on the exterior.
Mistake 4: Expiration dates in the wrong format
Amazon requires the MM-YYYY or MM-DD-YYYY format, with a minimum 36-point font, visible on the exterior of each unit and the master carton.
If your supplier prints dates in a different format or only on the bottom of a bottle, that’s a compliance failure at receiving. Get this confirmed before production; correcting it post-manufacture means full re-labeling at a prep center.
Mistake 5: Shipping boxes that exceed Amazon’s limits
No side longer than 25 inches. Maximum 50 lbs. Over 50 lbs needs a “team lift” label. Over 100 lbs needs a “mechanical lift” label.
Oversized or overweight cartons get refused at the dock. Specify carton dimensions and weight limits in your purchase order. Suppliers pack for efficiency, not Amazon’s receiving rules.
Mistake 6: Not removing price stickers from retail arbitrage products
Any retail price sticker, store barcode, or competitor label still on the unit creates a compliance flag, especially in gated brand categories.
Remove completely with no residue. If adhesive leaves a mark, repackage or apply an opaque label over it.
Mistake 7: Not accounting for packaged dimensions in size tier classification
Amazon classifies products by final packaged dimensions and weight, not the product alone. A unit that measures small standard-size unpackaged cans can be tipped into large standard-size ones with a box, insert, and polybag, pushing it into a higher fulfillment fee tier.
Measure and weigh the final packaged unit and run it through the FBA revenue calculator before committing to a packaging format.
Mistake 8: Ignoring Amazon’s shelf-life minimums
For any product with an expiration date, Amazon enforces a minimum remaining shelf life at receiving, typically 90 days for most categories. Inventory arriving below that threshold gets flagged for removal at your expense.
Factor in transit time and prep time into your reorder cycle, and build minimum shelf-life requirements into your supplier agreement.
Final thoughts
If you’ve been trying to understand what FBA prep is and why it matters so much, here’s the simplest way to think about it: it’s the difference between inventory that sells and inventory that sits in limbo, costing you money.
The FBA prep process isn’t the exciting part of selling on Amazon. No one gets into e-commerce because they love labeling requirements and polybag specs. But it’s the part that determines whether everything else you’ve built, right from the sourcing, the listing, and the PPC, actually pays off.
Meeting Amazon FBA prep requirements isn’t optional, and it isn’t something you can figure out as you go. With the Amazon FBA prep service now discontinued, the safety net that used to catch mistakes for a fee no longer exists.
You can’t send inventory in unprepared and let Amazon fix it. What’s left is your own process, a reliable FBA prep center, or a combination of both. The sellers who get this right build a system once and stop thinking about it. Inventory goes in clean, checks in fast, and sells.
The post What is FBA prep? Everything Amazon sellers need to know appeared first on SellerApp Blog.
from SellerApp Blog https://ift.tt/Rj6lcWO
via IFTTT
Add a review